
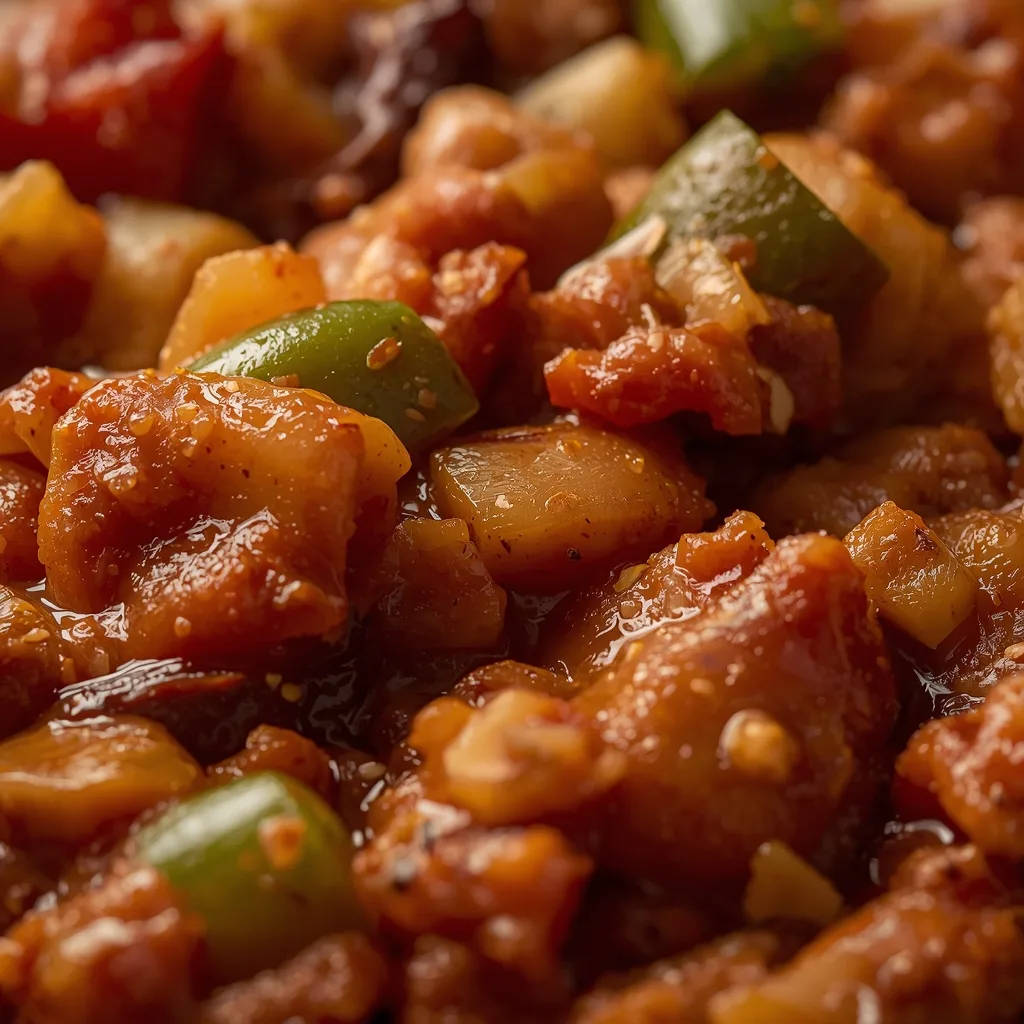
There’s something incredibly comforting about a big pot of Hairy Bikers Vegetarian Chilli simmering on the stove. This recipe delivers a thick, smoky, and satisfying bowl that’s packed with protein, making it a brilliant midweek meal for the whole family.
It’s perfect for batch cooking, casual dinners, or feeding a crowd. From start to finish, you’re looking at about an hour, and it’s a fantastic beginner-friendly recipe. The key to the best flavor is taking your time with the spices—a step you won’t want to rush.
What Is Hairy Bikers Vegetarian Chilli?
This is a hearty, Tex-Mex-inspired dish that uses beans as its protein powerhouse instead of meat. What sets it apart is its focus on building layers of flavor, from slowly softened onions to properly toasted spices.
The result is a rich, complex sauce with a subtle kick and a wonderfully thick texture. It’s the kind of one-pot wonder that tastes even better the next day, as all the flavors have more time to meld together.
Gather These Fresh Ingredients for Hairy Bikers’ Vegetarian Chilli
You’ll be pleased to know most of these are pantry staples. Here’s what you need, broken down by their role in the dish.
Aromatics & Veg
- 1 tbsp olive oil — This is our cooking fat for sautéing. A neutral oil like vegetable works too, but olive oil adds a touch of fruitiness.
- 1 medium onion, finely diced — The sweet foundation. A yellow or brown onion works best here for its mellow flavor when cooked.
- 2 cloves garlic, minced — For that essential aromatic punch. Fresh is always better than jarred for this.
- 1 red & 1 green bell pepper, diced — They add sweetness, color, and a bit of texture. Using two colors isn’t just for looks; it gives a more rounded flavor.
The Spice Blend
- 1 tbsp chilli powder — This is your main source of that classic chilli flavor and mild heat. Don’t confuse it with pure cayenne.
- 1 tsp each ground cumin & smoked paprika — Cumin adds earthiness, while the smoked paprika gives that deep, almost barbecue-like smokiness which is crucial.
- 1/2 tsp cayenne pepper — This is your heat control. Use the full amount for a proper kick, or scale it right back if you’re sensitive to spice.
Beans, Tomatoes & Liquid
- 1 can (15 oz) diced tomatoes — They provide the tangy, acidic base of the sauce. Use the juices from the can—that’s free flavor.
- 2 cans (15 oz each) kidney beans & 1 can (15 oz) black beans — Drained and rinsed. This combination gives great texture and protein. Rinsing removes the starchy canning liquid.
- 1 cup vegetable broth — This loosens everything to the right consistency for simmering. A low-sodium stock lets you control the final salt level.
Seasoning
- 1 tsp kosher salt & 1/2 tsp black pepper — We add these at the end. Seasoning after simmering prevents the dish from becoming too salty as the liquid reduces.
Detailed Step-by-Step Instructions to Make Hairy Bikers Vegetarian Chilli
The process is simple but has a few ‘don’t skip’ moments. Here’s how I walk through it.
- Heat Your Base — Warm the olive oil in a large, heavy pot over medium heat until it shimmers. A Dutch oven is ideal here because it distributes heat evenly and prevents the onions from scorching in hot spots.
- Cook the Onion — Add the diced onion and cook for 5 to 7 minutes, stirring now and then. You’re not looking for color, just for it to turn soft and translucent. This gentle sweating builds a sweet foundation.
- Add Garlic & Peppers — Stir in the garlic and bell peppers. Cook for another 3-4 minutes until fragrant. The trick is to keep the garlic from browning, which can make it bitter.
- Toast the Spices — This is the flavor magic. Add all the dried spices (chilli powder, cumin, smoked paprika, cayenne) and stir constantly for a full minute. You’ll smell them become incredibly fragrant.
- Deglaze with Tomatoes — Pour in the diced tomatoes with all their juices, scraping the bottom of the pot. This picks up any tasty browned bits and stops the spices from cooking any further.
- Add Beans & Broth — Stir in the drained beans and vegetable broth until everything is well combined. Make sure the beans are submerged for even cooking.
- Simmer Gently — Bring it to a simmer, then reduce the heat to low. Partially cover the pot, leaving a small gap. Let it bubble away gently for 30 to 40 minutes.
- Check for Doneness — The chilli is ready when it has thickened noticeably and the flavors have come together. The beans should be tender but not mushy.
- Season at the End — Now stir in the salt and black pepper. Taste it—you might want an extra pinch of salt depending on your broth.
- Thicken the Texture — For a creamier consistency, use a masher or spoon to gently crush about a quarter of the beans against the pot wall. This releases starch and thickens the sauce naturally.
- Let It Rest — Take the pot off the heat and let it sit uncovered for 5-10 minutes. This settling time makes the texture perfect for serving.
- Garnish and Serve — Ladle into bowls and add your favorite toppings. The fresh contrast of avocado or cilantro really lifts the rich, spiced base.
Common Mistakes and How I Fixed Them
I’ve made my share of lacklustre chilis over the years. Here are the pitfalls I learned to avoid the hard way.
- Rushing the onions — I once got impatient and didn’t let them soften fully. The result was a harsh, raw onion flavor that never really blended in. Now I give them the full 7 minutes.
- Burning the garlic — Adding garlic with the onions seemed like a time-saver. It always burned and turned bitter before the onions were done. Adding it later with the peppers was the fix.
- Skipping the spice toast — I used to just stir spices into the wet ingredients. Toasting them first in the oil for a minute makes the flavor deeper and warmer, not dusty.
- Over-salting early — Seasoning at the beginning seemed logical. But as the broth reduces, the salt concentrates. I now only add salt at the very end.
- Boiling too vigorously — A rolling boil can break down the beans into mush. A gentle, partially-covered simmer is the key to tender beans in a thick sauce.
- Forgetting the mash — My chilli was always a bit too soupy until I tried mashing some beans. That one step transformed it from a soup to a proper, cling-to-your-spoon chilli.
What Pairs Perfectly with This Dish
This chilli is a fantastic centerpiece. Here are my favorite ways to serve it.
- Fluffy rice — Plain white or brown rice is the classic bed for soaking up all that delicious sauce.
- Warm tortillas — Soft flour or corn tortillas on the side let everyone make their own little wraps.
- A simple green salad — Something crisp and light with a lime vinaigrette cuts through the richness beautifully.
- Buttery cornbread — The sweet, crumbly texture is the ultimate companion to a spicy, smoky bowl.
- Tortilla chips — For scooping straight from the bowl or crumbling on top for crunch.
- Roasted sweet potato — A hearty, sweet base that turns the chilli into a more substantial meal.
Pro Tips for Making the Best Results
A few small tweaks can make a big difference in your final dish.
- Your pot matters — Use a heavy-bottomed Dutch oven or pot. Thin pans can create hot spots that burn the spices and onions.
- Freshly grind your pepper — It sounds small, but the floral, sharp aroma of freshly cracked black pepper is far superior to pre-ground.
- Adjust heat at the end — Taste after simmering. If you want more kick, stir in a pinch of cayenne then, not earlier.
- Embrace the leftovers — This dish genuinely tastes better the next day. The flavors continue to develop in the fridge.
- Don’t skip the rest time — Letting it sit off the heat for 10 minutes allows the starch from the beans to finish thickening the sauce.
- Rinse your beans thoroughly — That cloudy liquid in the can can make the final dish taste a bit tinny and look murky.
- Use the right chilli powder — Ensure you’re using a blended chilli powder (which contains other spices) and not 100% pure chilli or cayenne, which will be far too hot.
Inspiring Variations Worth Trying
This recipe is wonderfully adaptable. Here are some easy twists.
- Add some ‘meatiness’ — For a richer texture, stir in a cup of cooked green or brown lentils along with the beans.
- Boost the veggies — Add a diced carrot or courgette with the bell peppers for extra nutrition and sweetness.
- Try different beans — Pinto beans or cannellini beans make great substitutes for either the kidney or black beans.
- Make it smoky — Add a teaspoon of chipotle paste with the tomatoes for an intense, smoky heat.
- Stir in some sweetness — A tablespoon of tomato puree or a dash of maple syrup can balance intense heat and acidity beautifully.
- Create a creamy version — Just before serving, swirl in a couple of tablespoons of vegan sour cream or coconut milk for a luxurious finish.
How to Store Hairy Bikers Vegetarian Chilli Properly
This is a brilliant make-ahead meal. Here’s how to keep it tasting great.
- Cool it quickly — Let the pot sit until it stops steaming, then transfer the leftovers to storage containers. Don’t leave it out for hours.
- Fridge for the week — Store in an airtight container for up to 4 days. The flavor will be at its peak around day two.
- Freeze in portions — For longer storage, freeze in individual portions for up to 3 months. Leave a little space at the top of the container as it will expand.
- Label everything — Write the date on the container with a marker. Even the best cooks forget what’s in the freezer after a month.
- Use a glass container — If reheating in the microwave, glass won’t stain or retain odors like plastic sometimes can.
Smart Reheating Tips for Leftovers
Gentle reheating is key to preserving the texture. Here are the best methods.
- Stovetop method — Gently warm portions in a saucepan over medium-low heat, stirring occasionally. Add a splash of water or broth if it seems too thick.
- Microwave reheating — Heat individual servings at 70% power for 2-3 minutes, stirring halfway through. This prevents the beans from exploding.
- From frozen — Always thaw frozen chilli overnight in the fridge first. Then reheat it on the stovetop as above for the best results.
FAQs
Can I freeze Hairy Bikers Vegetarian Chilli?
Absolutely, it freezes brilliantly. Just make sure it’s completely cool first, then portion it into freezer-safe containers. It will keep for up to 3 months.
How long does this chilli last in the fridge?
Stored properly in a sealed container, it will stay fresh and tasty for up to 4 days. I often find it tastes even better on the second day.
Is this recipe gluten-free and vegan?
Yes, as written with vegetable broth, this dish is both vegan and gluten-free. Always double-check your stock brand if you have a severe intolerance.
My chilli is too watery. How can I thicken it?
Simmer it uncovered for an extra 10-15 minutes to reduce the liquid. You can also mash more of the beans against the side of the pot with your spoon.
Can I make this in a slow cooker?
You can. Follow steps 1-4 in a pan to cook the onions, peppers, and toast the spices. Then transfer everything to your slow cooker and cook on low for 6-8 hours.
What’s the best way to adjust the heat level?
Control the spice with the cayenne pepper. Use just a pinch for mild, the full half-teaspoon for medium, and add a little more at the end if you want it fiery.
Nutritional Value
Based on one serving out of four total.
- Calories: 335
- Protein: 19g
- Fat: 5g
- Carbohydrates: 57g
- Fiber: 18g
- Sugar: Around 5g
- Sodium: Roughly 575mg
Try These Recipes
- Hairy Bikers Cranachan
- Hairy Bikers Slow Cooker Chilli Con Carne
- Mary Berry Bavette Steak
- Jamie Oliver Guacamole
Wrapping Up
This is truly a reliable, crowd-pleasing recipe that never fails to deliver comfort. Whether you’re cooking for a busy week or a relaxed weekend, this Hairy Bikers Vegetarian Chilli is a fantastic staple to have in your repertoire. I hope it becomes a regular in your kitchen, too.
PrintHairy Bikers Vegetarian Chilli
This hearty vegetarian chilli is packed with protein-rich kidney and black beans, simmered with aromatic spices, diced tomatoes, and bell peppers for a smoky, slightly spicy flavor and thick, satisfying texture. It’s a comforting, versatile main course that can be topped with avocado, cilantro, or vegan sour cream for added freshness.
- Prep Time: 15
- Cook Time: 45
- Total Time: 60
- Yield: 4 1x
- Category: Main Course
- Method: Stovetop
- Cuisine: Tex-Mex
Ingredients
- 1 tablespoon olive oil
- 1 medium onion, finely diced
- 2 cloves garlic, minced
- 1 red bell pepper, diced
- 1 green bell pepper, diced
- 1 tablespoon chilli powder
- 1 teaspoon ground cumin
- 1 teaspoon smoked paprika
- 1/2 teaspoon cayenne pepper (adjust for heat preference)
- 1 can (15 oz) diced tomatoes, with juices
- 2 cans (15 oz each) kidney beans, drained and rinsed
- 1 can (15 oz) black beans, drained and rinsed
- 1 cup vegetable broth
- 1 teaspoon kosher salt, plus more to taste
- 1/2 teaspoon freshly ground black pepper
Instructions
- Heat the olive oil in a large Dutch oven or heavy-bottomed pot over medium heat until it shimmers, about 1-2 minutes. Using a heavy pot ensures even heat distribution and prevents hot spots that could burn the aromatics.
- Add the diced onion and cook, stirring occasionally with a wooden spoon, until translucent and softened, about 5-7 minutes. Sweating the onions slowly releases their natural sugars, building a sweet, foundational flavor for the chilli.
- Stir in the minced garlic and diced bell peppers, cooking for another 3-4 minutes until the peppers begin to soften and the garlic is fragrant but not browned. Avoid browning the garlic to prevent a bitter taste that can overpower the dish.
- Add the chilli powder, cumin, smoked paprika, and cayenne pepper to the pot. Toast the spices for 1 minute, stirring constantly, until they become aromatic and darken slightly. Toasting activates the oils in the spices, enhancing their depth and complexity.
- Pour in the diced tomatoes with their juices, scraping the bottom of the pot with the spoon to deglaze any browned bits (fond). This step incorporates caramelized flavors into the sauce, adding richness and body.
- Add the drained and rinsed kidney beans, black beans, and vegetable broth, stirring to combine thoroughly. Ensure the beans are evenly distributed to cook uniformly and absorb the spices.
- Bring the mixture to a gentle simmer over medium-high heat, which should take about 3-5 minutes, then reduce the heat to low. Partially cover the pot with a lid, leaving a small crack for steam to escape, which prevents boiling over while allowing reduction.
- Simmer the chilli for 30-40 minutes, stirring occasionally every 10 minutes, until it has thickened and the flavors are well melded. The beans should be tender but still hold their shape, and the liquid should be reduced by about one-third.
- Season with 1 teaspoon kosher salt and freshly ground black pepper to taste, stirring well. Adjust salt after simmering, as the reduction concentrates flavors, and avoid oversalting early on.
- For a thicker, creamier consistency, use a potato masher or the back of a spoon to mash about one-quarter of the beans against the side of the pot. This releases starches that naturally thicken the chilli without needing additional thickeners.
- Remove the pot from heat and let the chilli rest, uncovered, for 5-10 minutes before serving. Resting allows the flavors to settle and the texture to thicken slightly, improving the overall mouthfeel.
- Serve hot in bowls, garnished with optional toppings like avocado slices, fresh cilantro, lime wedges, or vegan sour cream. These add freshness and contrast to the rich, spiced base.
Notes
Store leftover chilli in an airtight container in the refrigerator for up to 4 days. For longer storage, freeze in portion-sized containers for up to 3 months. Reheat on the stovetop over medium heat, stirring occasionally, until bubbling and heated through, about 5-7 minutes. Alternatively, microwave individual servings at 70% power for 2-3 minutes, stirring halfway. If frozen, thaw overnight in the refrigerator before reheating.
Nutrition
- Calories: 335
- Sugar: 5g
- Sodium: 575mg
- Unsaturated Fat: 0.5g
- Carbohydrates: 57g
- Fiber: 18g
- Protein: 19g
- Cholesterol: 0mg
Keywords: vegetarian chilli, Hairy Bikers chilli, meatless chilli, bean chilli, Tex-Mex recipe, stovetop chilli, weeknight dinner, healthy vegetarian meal, spicy bean stew, homemade chilli, plant-based dinner, easy chilli recipe