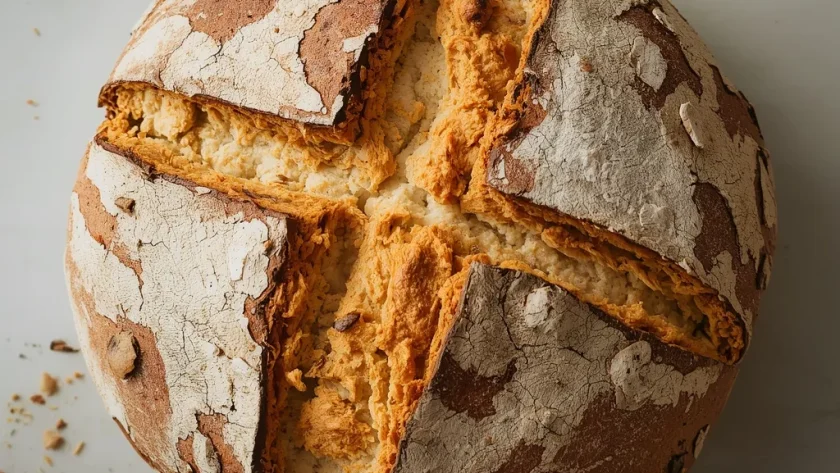
I’ve always believed a perfect loaf of Paul Hollywood Sourdough Bread is the ultimate test of patience and technique. It rewards you with a crisp, blistered crust and a soft, airy crumb full of complex flavor.
This recipe uses a slow, room-temperature fermentation that builds incredible depth. The total hands-off time is long, around 7 hours, but the active work is minimal.
I’d call it an intermediate recipe. Mastering the dough’s feel and timing is key, but I’ll guide you through every step.
What Is Paul Hollywood’s Sourdough Bread?
This isn’t your average quick loaf. It’s an artisan bread rooted in traditional methods, championed by the Great British Bake Off judge. The process relies entirely on a live, bubbly starter for leavening.
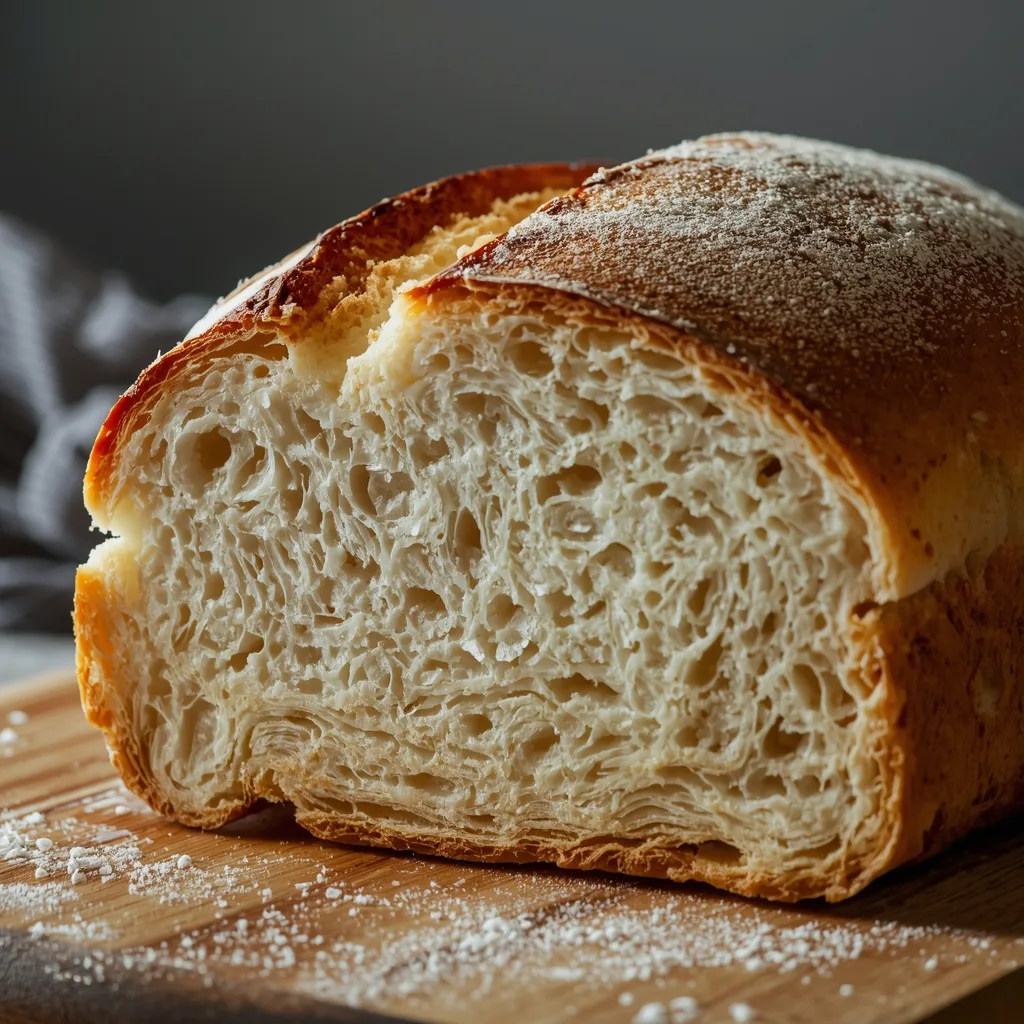
What sets it apart is the extended bulk fermentation and specific shaping. These steps develop the signature open crumb and chewy texture that sourdough fanatics love.
The subtle tang comes from that slow fermentation, not any added vinegar or yeast. It’s a project, but the smell of it baking is pure kitchen magic.
Gather These Fresh Ingredients for Paul Hollywood’s Sourdough Bread
Artisan baking starts with just a few quality components. Here’s what you need and why each one matters.
The Leaven
- 1 cup active sourdough starter (100% hydration, bubbly and fed) — This is the heart of your loaf. Ensure it’s at peak activity, which usually means it’s been fed 4-8 hours prior and has doubled in size.
- 1 1/2 cups lukewarm water (filtered, at 105°F / 40°C) — The warm temperature wakes up the wild yeast. Using filtered water avoids chlorine that can inhibit fermentation.
The Dry Base
- 4 cups strong bread flour (such as King Arthur Bread Flour), plus extra for dusting — Bread flour has a higher protein content (12-14%) than all-purpose, which is essential for building the strong gluten network needed for that airy, holey crumb.
- 2 teaspoons fine sea salt — Salt tightens the gluten structure and enhances flavor. Fine sea salt dissolves more evenly than coarse kosher salt in the dough.
For the Bowl
- 1 tablespoon olive oil, for greasing the bowl — A light coating prevents the dough from sticking during its long rise, making it easier to turn out.
Detailed Step-by-Step Instructions to Make Paul Hollywood Sourdough Bread
The method is a series of simple stages. Follow them patiently for the best structure.
- Combine Starter and Water — In a large bowl, vigorously whisk the starter and lukewarm water until milky. This initial step hydrates the starter fully, ensuring even fermentation throughout the dough.
- Mix in the Flour — Add all the bread flour and mix until just combined into a shaggy mass. Don’t worry about smoothness here; you just want no dry patches of flour left.
- Incorporate the Salt — Sprinkle the salt over the dough. With wet hands, gently fold and squeeze it in for about two minutes. Adding salt after the initial mix prevents it from hampering the yeast right away.
- Autolyse Rest — Cover the bowl and let it sit for 30 minutes. This rest period allows the flour to fully absorb the water, making the gluten development during kneading much easier and more effective.
- Knead to Develop Gluten — Turn the dough onto a floured surface and knead for 10-15 minutes. You’re aiming for a smooth, elastic dough that passes the windowpane test. This builds the strength needed to trap gas from fermentation.
- Bulk Fermentation with Folds — Place the dough in an oiled bowl, cover, and let rise for 4-6 hours. Perform stretch-and-folds every 30 minutes for the first 2 hours. These folds dramatically strengthen the dough without over-kneading.
- Shape the Boule — Gently turn the risen dough out and shape it into a tight round. Creating surface tension on top is crucial for the bread to hold its shape and rise in the oven.
- Final Proof — Place the dough seam-side up in a floured banneton. Cover and proof for 1-2 hours. It’s ready when a gentle finger poke leaves a slight indent that slowly fills back.
- Preheat with Vessel — Preheat your oven to 450°F / 230°C with a Dutch oven inside for at least 30 minutes. The preheated pot is non-negotiable for creating the steam needed for oven spring.
- Score and Transfer — Tip the dough onto parchment paper. Score the top about 1/4 inch deep with a sharp blade. This controls where the loaf expands dramatically during baking.
- Bake Covered for Steam — Using the parchment as a sling, lower the dough into the hot Dutch oven. Cover with the lid and bake for 20 minutes. This trapped steam environment lets the loaf rise fully before the crust sets.
- Bake Uncovered to Finish — Remove the lid and reduce the heat to 400°F / 200°C. Bake for another 25-30 minutes until deep golden brown and hollow-sounding. An internal temperature of 210°F / 99°C confirms it’s done.
- Cool completely — Transfer the loaf to a wire rack. Let it cool for at least 2 hours before slicing. Cutting too soon releases steam and gives you a gummy, dense crumb.
- Slice and Serve — Once fully cooled, use a serrated bread knife to slice. Enjoy it fresh for the ultimate textural experience of crisp crust and soft interior.
Common Mistakes and How I Fixed Them
My first few loaves were dense, flat learning experiences. Here’s what went wrong and how to avoid it.
- An inactive starter — My bread didn’t rise because my starter wasn’t bubbly and active. I now always do the float test: drop a teaspoon of starter in water; if it floats, it’s ready.
- Skipping the stretch and folds — I once just let the dough sit for the bulk rise. Without those folds, it lacked structure and spread flat. The folds build a web of gluten that holds the air pockets.
- Overproofing the dough — Letting it proof too long makes the gluten network collapse. I watch for the finger dent test, not the clock. In a warm kitchen, it can be ready in just over an hour.
- Not preheating the Dutch oven — A cold pot won’t create an instant burst of steam. My loaf had poor oven spring and a pale crust. Now I preheat it for a full 30 minutes, no less.
- Cutting while warm — The temptation is real, but slicing into a warm loaf steams the interior. I set a timer for two hours to resist. The wait guarantees a perfect, set crumb.
- Using a dull blade to score — A dull knife drags and deflates the dough instead of making a clean cut. Investing in a bread lame or using a very sharp razor blade made my scoring and rising much more effective.
What Pairs Perfectly with Paul Hollywood Sourdough Bread
Its robust flavor and texture make it a fantastic base for so many things.
- Rich, salted butter — A thick slab melting into the warm, porous crumb is a simple, unbeatable pleasure. The salt highlights the bread’s subtle tang.
- Quality olive oil and balsamic — A shallow bowl of extra-virgin olive oil with a swirl of aged balsamic for dipping makes an elegant, Italian-inspired starter.
- Hearty soups and stews — This bread is made for dunking. It stands up to thick pea and ham soup or a beef stew without disintegrating.
- Strong cheeses — Try it with a sharp cheddar, creamy Stilton, or a slice of aged Gouda. The bread’s acidity cuts through the fat beautifully.
- Smoked salmon and cream cheese — For a luxurious breakfast or brunch, top a toasted slice with a schmear, salmon, capers, and fresh dill.
- Avocado and chili flakes — Smashed avocado on sourdough toast is a classic. A sprinkle of chili flakes and a squeeze of lime lift it perfectly.
Pro Tips for Making the Best Paul Hollywood Sourdough Bread
These small adjustments, learned from trial and error, will elevate your baking.
- Maintain a consistent starter — Keep your sourdough starter on a regular feeding schedule. A happy, predictable starter is the single biggest factor for consistent results.
- Trust the dough’s feel, not just the time — Fermentation times are guidelines. In a cold room, it may need longer. Look for the dough being doubled in size and bubbly, not just the clock hitting 6 hours.
- Use a digital scale for flour — Cup measurements can vary wildly. For true accuracy, I now weigh my flour. This recipe uses about 520 grams of bread flour.
- Create steam without a Dutch oven — If you lack a Dutch oven, place a metal tray in the oven’s bottom while preheating. Pour a cup of hot water into it when you load the bread to create a steamy environment.
- Let the shaped loaf rest before scoring — After transferring the dough to the parchment, let it sit for 5 minutes. This brief rest lets the surface skin relax, making for cleaner, easier scoring.
- Check the internal temperature — The hollow tap test is good, but an instant-read thermometer is foolproof. Pull the bread at 210°F / 99°C for a perfectly baked interior.
- Embrace the blistering — Those dark, blistered spots on the crust are a sign of a long, slow fermentation. Don’t see them as burnt; they add incredible flavor and texture.
Inspiring Variations Worth Trying
Once you’ve mastered the basic loaf, these simple tweaks can create wonderful new flavors.
- Whole Wheat Version — Substitute up to one cup of the bread flour with whole wheat flour. It will yield a denser, nuttier loaf with more fiber.
- Seeded Crust Loaf — After scoring, mist the loaf lightly with water and press a mixture of sesame, flax, and sunflower seeds into the surface. They toast beautifully in the oven.
- Garlic and Rosemary Fold-In — During the stretch and folds, incorporate 2 cloves of minced garlic and a tablespoon of chopped fresh rosemary for a fragrant, savory bread.
- Rye Sourdough Twist — Replace one cup of bread flour with dark rye flour. Expect a denser, darker loaf with a more pronounced, earthy tang.
- Cheese and Black Pepper — Fold in a cup of grated strong cheddar and a teaspoon of coarsely ground black pepper during the final shaping for a stunning tear-and-share loaf.
How to Store It Properly
Storing artisan bread is different from soft sandwich loaves. The goal is to preserve the crust.
- Room Temperature Short-Term — Keep the whole loaf in a paper bag on the counter for up to 3 days. The paper allows moisture to escape, keeping the crust crisp longer than plastic.
- Freezing for Longevity — For longer storage, wrap the cooled loaf tightly in plastic wrap and then foil. Freeze for up to 3 months. This prevents freezer burn and preserves flavor.
- Pre-Slice Before Freezing — Slice the loaf before freezing. You can then pull out individual slices to toast straight from the freezer, which is incredibly convenient.
- Reviving a Stale Loaf — If the bread goes a bit stale but isn’t moldy, run the whole loaf under the tap for a second and bake at 350°F / 175°C for 10 minutes. It works wonders.
Smart Reheating Tips
Never use the microwave for the whole loaf—it turns the crust rubbery. These methods restore the fresh-baked feel.
- Oven Method (Best for Whole Loaf) — Preheat your oven to 350°F / 175°C. Place the room-temperature or frozen loaf directly on the rack and bake for 10-15 minutes until warm and crispy.
- Toaster for Single Slices — This is the fastest way to revive individual slices. Use a medium setting to warm the crumb and re-crisp the edges without burning.
- Air Fryer Quick Warm — For a slice or two, an air fryer at 320°F / 160°C for 3-4 minutes heats it quickly and keeps the exterior pleasantly crunchy.
FAQs
Can I make Paul Hollywood Sourdough Bread without a Dutch oven?
Yes, you can. Use a baking stone or an inverted baking sheet. Place a metal pan on the oven floor while preheating. Pour hot water into it when you load the bread to create steam.
How do I know if my sourdough starter is active enough?
It should be bubbly, have roughly doubled in size after feeding, and pass the float test. If it smells only sour without a yeasty, fruity aroma, it may need another feeding.
Why is my sourdough bread so dense and not airy?
A dense crumb usually points to under-proofing, a weak starter, or over-handling after the bulk rise. Ensure your starter is vigorous and give the dough enough time to rise properly.
How long does Paul Hollywood’s Sourdough Bread last?
At peak freshness, it’s best within 3 days. The crust will soften over time, but the flavor often deepens. Freezing is the best way to extend its life for months.
Can I use all-purpose flour instead of bread flour?
You can, but the results will differ. Bread flour’s higher protein creates a stronger gluten network. With all-purpose flour, expect a slightly less chewy texture and a tighter crumb.
What’s the purpose of scoring the dough?
Scoring controls the expansion of the loaf in the oven. Without it, the bread will burst at its weakest point. It also creates that beautiful, signature artisan look.
Nutritional Value
Based on 1 serving = 1/4 of the whole loaf.
- Calories: 580
- Protein: 15g
- Fat: 5g
- Carbohydrates: 114g
- Fiber: 4g
- Sugar: 0.5g
- Sodium: around 1150mg
Wrapping Up
Baking this loaf is a deeply satisfying journey. The process teaches you to read the dough and respect time as an ingredient.
I hope this guide gives you the confidence to bake your first, or your best, Paul Hollywood Sourdough Bread. Share a slice with thick butter, and you’ll taste every hour of care you put into it.
PrintPaul Hollywood Sourdough Bread

This artisan sourdough bread boasts a crisp, golden crust and a soft, airy crumb with a subtle tang. Inspired by Paul Hollywood’s techniques, it uses slow fermentation for deep flavor and perfect structure.
- Prep Time: 30
- Cook Time: 50
- Total Time: 470
- Yield: 4 1x
- Category: Breakfast
- Method: Baking
- Cuisine: Artisan Bread
Ingredients
- 1 cup active sourdough starter (100% hydration, bubbly and fed)
- 1 1/2 cups lukewarm water (filtered, at 105°F / 40°C)
- 4 cups strong bread flour (such as King Arthur Bread Flour), plus extra for dusting
- 2 teaspoons fine sea salt
- 1 tablespoon olive oil, for greasing the bowl
Instructions
- In a large mixing bowl, combine the active sourdough starter and lukewarm water. Stir vigorously with a whisk or fork until the starter is mostly dissolved and the mixture appears milky. This ensures even hydration and activates the wild yeast for optimal fermentation.
- Add the bread flour to the bowl. Using a dough whisk or your hands, mix until no dry flour remains and a shaggy, rough dough forms. Avoid overmixing at this stage to prevent developing too much gluten prematurely, which can make the dough tough.
- Sprinkle the fine sea salt evenly over the dough. With wet hands to prevent sticking, gently incorporate the salt by folding and squeezing the dough for about 2 minutes. Salt strengthens the gluten network but can inhibit yeast if added too early, so it’s added after initial mixing.
- Cover the bowl with a damp kitchen towel or plastic wrap. Let it rest at room temperature (around 70°F / 21°C) for 30 minutes. This autolyse period allows the flour to fully absorb water, improving dough elasticity and making kneading easier.
- After resting, turn the dough out onto a lightly floured surface. Knead for 10-15 minutes, using the heel of your hand to push the dough away, then fold it back. The dough is ready when smooth, elastic, and it passes the windowpane test: stretch a small piece thinly; it should not tear easily.
- Place the kneaded dough in a bowl lightly coated with olive oil, turning to coat all sides. Cover with the towel or plastic wrap. Let it rise at room temperature for 4-6 hours, or until doubled in size. Perform stretch and folds every 30 minutes for the first 2 hours: wet your hands, lift one side, and fold it over, repeating on all sides to strengthen the dough.
- Once doubled, gently turn the dough out onto a floured surface without punching it down. Shape it into a round boule by stretching the edges and tucking them under, creating surface tension. This helps the bread hold its shape and rise properly during baking.
- Place the shaped dough seam-side up in a well-floured banneton or a bowl lined with a floured kitchen towel. Cover and let proof at room temperature for 1-2 hours, or until it passes the finger dent test: gently press a finger into the dough; it should slowly spring back, leaving a slight indent.
- Preheat the oven to 450°F / 230°C. Place a Dutch oven or baking stone inside to heat for at least 30 minutes. A preheated vessel creates steam, which is crucial for a crispy crust and good oven spring.
- Carefully transfer the proofed dough to a piece of parchment paper. Score the top with a sharp lame or knife in a pattern, about 1/4 inch deep. Scoring controls where the bread expands during baking and adds an attractive finish.
- Using the parchment paper as a sling, lower the dough into the preheated Dutch oven. Cover with the lid and bake for 20 minutes. The covered bake traps steam, allowing the bread to rise fully and develop an initial set crust.
- After 20 minutes, remove the lid and reduce the oven temperature to 400°F / 200°C. Continue baking for another 25-30 minutes, or until the crust is deep golden brown and sounds hollow when tapped. For accuracy, check the internal temperature with a thermometer; it should read 210°F / 99°C.
- Remove the bread from the oven and transfer to a wire rack. Allow it to cool completely for at least 2 hours before slicing. Cooling allows the crumb to set and prevents a gummy texture, ensuring perfect slices.
- Once cooled, slice and serve. Store any leftovers as per the notes for best freshness.
Notes
Store the bread in a paper bag at room temperature for up to 3 days to maintain crust crispness. For longer storage, wrap tightly in plastic wrap and freeze for up to 3 months. To reheat, place frozen or room temperature bread in a preheated 350°F / 175°C oven for 10-15 minutes until warm and crispy.
Nutrition
- Calories: 580
- Sugar: 0.5g
- Sodium: 1150mg
- Saturated Fat: 1g
- Carbohydrates: 114g
- Fiber: 4g
- Protein: 15g
- Cholesterol: 0mg
Keywords: paul hollywood sourdough, sourdough bread recipe, artisan bread, homemade sourdough, slow fermented bread, bread baking, crusty sourdough, tangy bread, british baking, weekend project, baking from scratch, sourdough loaf


