
 Ekani Ella
 Every garden has that moment at the end of the season — a cluster of green tomatoes that refuse to ripen. Instead of letting them go to waste, this River Cottage Green Tomato Chutney turns them into something bold, tangy, and deeply comforting.
I love this recipe because it transforms sharp, firm tomatoes into a rich, sweet-and-sour preserve. The vinegar mellows. The spices warm. And over time, the flavors deepen beautifully in the jar.
If you enjoy chutneys that balance sweetness and acidity with a gentle spice, this one deserves a spot in your pantry.
What is River Cottage Green Tomato Chutney?
River Cottage is known for celebrating seasonal British produce and traditional preserving. Green tomato chutney fits perfectly within that philosophy.
Unlike jam or jelly, chutney is chunkier and more savory. It combines fruit or vegetables with vinegar, sugar, onions, and spices. The result is thick, glossy, and packed with layered flavor.
Green tomatoes are ideal because their natural acidity holds structure during cooking and creates that signature tang.
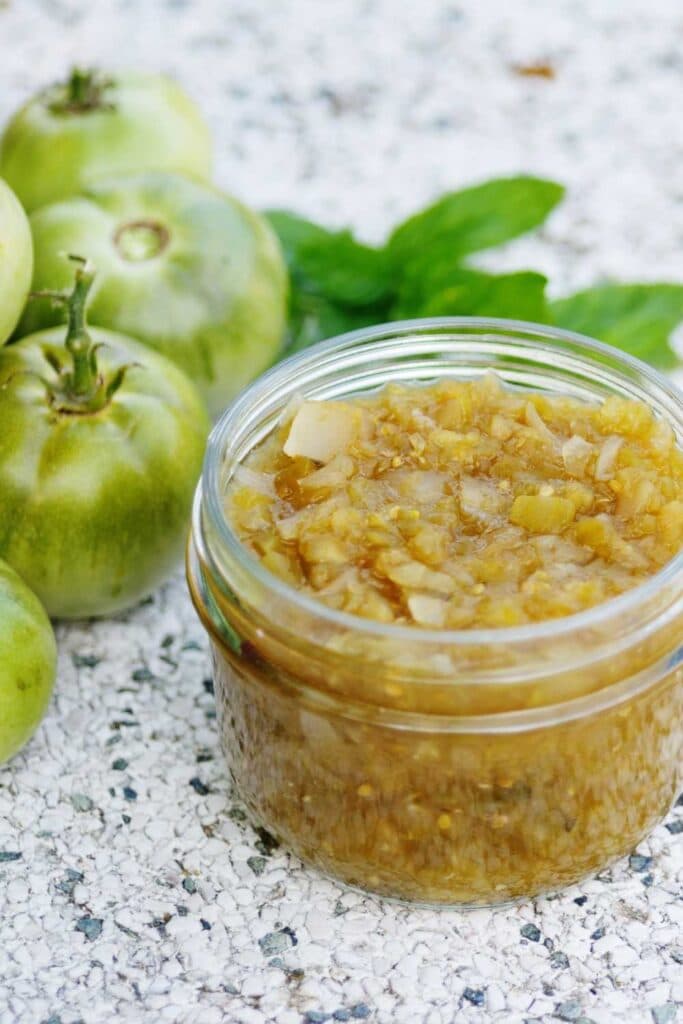
Gather These Fresh Ingredients for River Cottage Green Tomato Chutney
Ingredients You’ll Need for This Recipe
For the Vegetable Base
- 1 kg green tomatoes, chopped
- 2 medium onions, finely diced
- 1 cooking apple, peeled and chopped
- 2 cloves garlic, minced
Quality note: Use firm green tomatoes without soft spots. Slight blemishes are fine, but avoid overly bruised fruit.
For Sweetness and Balance
- 200 g brown sugar
- 150 ml apple cider vinegar
- 100 g raisins
For Spices and Depth
- 1 teaspoon ground ginger
- ½ teaspoon chili flakes (optional)
- 1 teaspoon mustard seeds
- ½ teaspoon ground allspice
- 1 teaspoon salt
The balance between sugar and vinegar creates that classic chutney flavor — tangy yet slightly sweet.
Detailed Step-by-Step Instructions to Make River Cottage Green Tomato Chutney
Step 1: Prepare the Vegetables
Wash the green tomatoes thoroughly and chop them into small, even pieces. Dice the onions and apple. Keep everything roughly uniform in size so the chutney cooks evenly.
Step 2: Combine in a Large Pot
Place tomatoes, onions, apple, garlic, raisins, sugar, vinegar, salt, and spices into a large heavy-bottomed saucepan.
Stir gently to combine.
Step 3: Bring to a Gentle Boil
Heat the mixture over medium heat until the sugar dissolves. Once it begins to simmer, reduce the heat to low.
Let it cook uncovered for 60–75 minutes, stirring occasionally.
You’ll notice the mixture thickening gradually and turning darker in color.
Step 4: Check for Thickness
The chutney is ready when it becomes thick and glossy. Draw a spoon across the bottom of the pan — if it leaves a clear trail that doesn’t immediately fill with liquid, it’s done.
Avoid rushing this step. Slow cooking develops depth.
Step 5: Jar and Seal
Spoon the hot chutney into sterilized jars. Seal immediately while hot.
Allow to cool completely before storing.
For the best flavor, let the chutney mature for at least 2–3 weeks before opening.
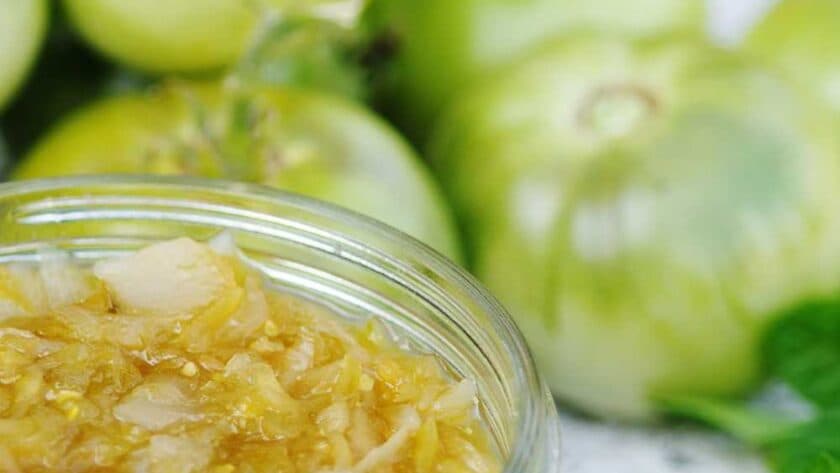
Common Mistakes and How I Fixed Them
I’ve made chutney more times than I can count, and small details make a big difference.
- I once chopped tomatoes too large – Texture felt uneven. Smaller pieces cook better.
- Added too much vinegar – The flavor became harsh. Measure carefully.
- Stopped cooking too early – It was too runny. Now I wait for proper thickness.
- Didn’t stir enough – The bottom caught slightly. Occasional stirring prevents sticking.
- Opened the jar too soon – Flavor was sharp. Resting improves balance.
What Pairs Perfectly with River Cottage Green Tomato Chutney
- Sharp Cheddar Cheese – sweet and tangy contrast works beautifully.
- Cold Roast Meats – adds moisture and acidity.
- Ham Sandwiches – lifts simple flavors instantly.
- Grilled Sausages – cuts through richness.
- Ploughman’s Lunch – completes the traditional plate.
Pro Tips for Making River Cottage Green Tomato Chutney
- Chop evenly – Uniform size ensures even cooking.
- Cook slowly – Low heat prevents burning.
- Taste as it thickens – Adjust sugar or vinegar if needed.
- Use a heavy pan – Prevents scorching at the base.
- Sterilize jars properly – Extends shelf life safely.
- Allow maturation time – Flavor improves after a few weeks.
- Label jars clearly – Track storage dates.
Inspiring Variations of River Cottage Green Tomato Chutney
- Spiced Autumn Version – Add a cinnamon stick during cooking.
- Smoky Twist – Include smoked paprika for depth.
- Extra Heat – Increase chili flakes for a bolder finish.
- Ginger Boost – Use fresh grated ginger instead of ground.
- Apple-Heavy Blend – Add extra apple for sweetness.
- Herb Finish – Stir in fresh thyme at the end.
How to Store River Cottage Green Tomato Chutney Properly
- Seal jars tightly – Prevents air exposure.
- Store in a cool, dark place – Protects flavor and color.
- Refrigerate after opening – Keeps fresh for several weeks.
- Use a clean spoon each time – Prevents contamination.
- Check lids before use – Ensure seal remains intact.
Smart Reheating Tips for River Cottage Green Tomato Chutney
Chutney does not need reheating for serving. However, if using as a glaze or sauce base, gently warm a few spoonfuls in a small saucepan over low heat.
Avoid boiling again, as it may alter the texture.
Try Other River Cottage Recipes
- River Cottage Nut Roast
- River Cottage Smoked Mackerel Pâté
- River Cottage Quince Jelly
- River Cottage Simnel Cake
River Cottage Green Tomato Chutney
River Cottage is known for celebrating seasonal British produce and traditional preserving. Green tomato chutney fits perfectly within that philosophy.
- Prep Time: 20
- Cook Time: 70
- Total Time: 1 hour 30 minutes
- Yield: 1 jar 1x
- Category: Condiment
- Method: Simmering
- Cuisine: British
Ingredients
For the Vegetable Base
-
1 kg green tomatoes, chopped
-
2 medium onions, finely diced
-
1 cooking apple, peeled and chopped
-
2 cloves garlic, minced
Quality note: Use firm green tomatoes without soft spots. Slight blemishes are fine, but avoid overly bruised fruit.
For Sweetness and Balance
-
200 g brown sugar
-
150 ml apple cider vinegar
-
100 g raisins
For Spices and Depth
-
1 teaspoon ground ginger
-
½ teaspoon chili flakes (optional)
-
1 teaspoon mustard seeds
-
½ teaspoon ground allspice
-
1 teaspoon salt
Instructions
Wash the green tomatoes thoroughly and chop into small, even pieces. Dice the onions and apple. Keep everything roughly uniform in size so the chutney cooks evenly.
Place tomatoes, onions, apple, garlic, raisins, sugar, vinegar, salt, and spices into a large heavy-bottomed saucepan.
Stir gently to combine.
Heat the mixture over medium heat until the sugar dissolves. Once it begins to simmer, reduce the heat to low.
Let it cook uncovered for 60–75 minutes, stirring occasionally.
You’ll notice the mixture thickening gradually and turning darker in color.
The chutney is ready when it becomes thick and glossy. Draw a spoon across the bottom of the pan — if it leaves a clear trail that doesn’t immediately fill with liquid, it’s done.
Avoid rushing this step. Slow cooking develops depth.
Spoon the hot chutney into sterilized jars. Seal immediately while hot.
Allow to cool completely before storing.
For best flavor, let the chutney mature for at least 2–3 weeks before opening.
Nutritional Value (Per Serving Approx.)
- Calories: ~60 kcal
- Protein: ~0 g
- Carbohydrates: ~15 g
- Fat: ~0 g
- Fiber: ~1 g
FAQs
Why is my green tomato chutney too runny?
Green tomato chutney becomes runny if it hasn’t cooked long enough or if the heat was too low. The mixture needs steady simmering until most of the liquid evaporates. Continue cooking uncovered and stir occasionally until a spoon dragged across the bottom leaves a clear trail that doesn’t immediately fill with liquid. Proper thickness develops slowly, so patience is key.
Can I use partially ripe tomatoes for green tomato chutney?
Yes, slightly ripened tomatoes can be used, but fully green, firm tomatoes are best. Partially ripe ones may make the chutney sweeter and softer in texture. If using mixed tomatoes, you may need slightly less sugar to maintain the sweet-and-sour balance.
How long should green tomato chutney mature before eating?
For the best flavor, allow the chutney to mature for at least 2–3 weeks in sealed jars. This resting period helps the vinegar mellow and the spices blend fully. While it can be eaten sooner, the taste becomes smoother and more balanced after proper maturation.
How do I know when green tomato chutney is ready to jar?
The chutney is ready when it becomes thick, glossy, and spoonable. Draw a wooden spoon across the bottom of the pan — if it leaves a channel that stays clear for a few seconds, it has reached the correct consistency. It should not appear watery or overly liquid.
Wrapping Up
The River Cottage Green Tomato Chutney proves that unripe fruit can become something remarkable. With slow cooking and balanced seasoning, sharp green tomatoes turn into a rich, glossy preserve full of character.
It’s practical, traditional, and deeply satisfying. Spread it, pair it, or gift it — this chutney carries the warmth of homemade preserving in every spoonful.