There’s something deeply satisfying about baking your own bread. The smell alone can transform your kitchen into a warm, inviting space. A farmhouse loaf is one of those classic recipes that never goes out of style.
If you’ve ever bought bread from a store and thought, “Why doesn’t it taste like homemade?”—this recipe answers that question. The difference is in the texture, the freshness, and the care you put into each step.
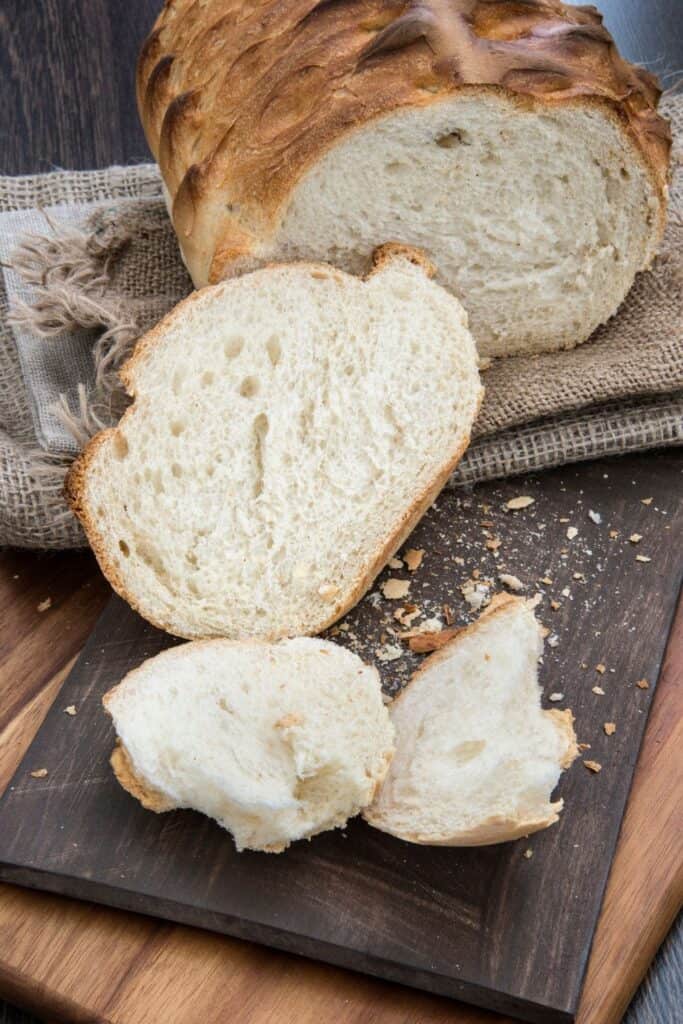
This Mary Berry Farmhouse Loaf is simple, reliable, and perfect for beginners. With a crisp crust and soft, airy interior, it’s the kind of bread you’ll want to bake again and again.
What is Mary Berry Farmhouse Loaf?
A Mary Berry Farmhouse Loaf is a traditional British white bread known for its soft crumb and lightly crisp crust. It’s typically baked in a loaf tin, giving it a neat shape that’s perfect for slicing.
Think of it as your everyday bread—but better. It’s ideal for sandwiches, toast, or simply enjoying with butter.
Unlike artisan sourdough, this loaf is straightforward and forgiving. It uses basic ingredients and a simple yeast-based method, making it a great starting point for home bakers.
Try Other Mary Berry Bread Recipes
Gather These Fresh Ingredients for Mary Berry Farmhouse Loaf
Using the right measurements is key to getting a soft, well-risen loaf. Even small changes can affect the final texture.
Dry Ingredients (Base Structure)
- Strong white bread flour – 500g (about 4 cups) – Provides structure and helps the loaf rise properly
- Salt – 1½ teaspoons – Enhances flavor and controls yeast activity
- Caster sugar – 1 teaspoon – Helps activate the yeast and adds a slight sweetness
Yeast Mixture (Leavening Agent)
- Active dry yeast – 7g (1 standard packet) – Essential for rising; make sure it’s fresh
- Warm water – 300ml (1¼ cups) – Should be lukewarm, not hot
Liquid Components (Texture & Softness)
- Warm milk – 2 tablespoons – Adds softness and a richer crumb
- Butter (softened) – 25g (2 tablespoons) – Improves flavor and texture
Optional Enhancements
- Egg – 1 small (optional) – Makes the loaf softer and slightly richer
- Seeds (optional) – 1–2 tablespoons – For topping (sesame, poppy, or mixed seeds)
Detailed Step-by-Step Instructions to Make Mary Berry Farmhouse Loaf
Step 1: Activate the Yeast
In a small bowl, mix warm water with sugar and yeast. Stir gently and let it sit for 5–10 minutes until it becomes frothy.
This step ensures your yeast is active and ready to work.
Step 2: Prepare the Dough
In a large mixing bowl, combine the flour and salt. Add the yeast mixture, warm milk, and softened butter.
Mix everything together until it forms a soft dough.
Step 3: Knead the Dough
Transfer the dough onto a lightly floured surface. Knead for about 8–10 minutes until it becomes smooth and elastic.
Think of kneading like stretching and folding—it builds the structure of the bread.
Step 4: First Rise (Proofing)
Place the dough in a lightly greased bowl and cover it with a clean cloth.
Let it rise in a warm place for about 1–1.5 hours, or until it doubles in size.
Step 5: Shape the Loaf
Once risen, punch down the dough gently to release air. Shape it into a loaf and place it into a greased loaf tin.
Make sure the dough fits evenly into the tin.
Step 6: Second Rise
Cover the loaf again and let it rise for another 30–40 minutes.
It should rise just above the edge of the tin.
Step 7: Bake the Bread
Preheat your oven to 200°C (180°C fan).
Bake the loaf for 25–30 minutes until golden brown and hollow-sounding when tapped underneath.
Step 8: Cool Before Slicing
Remove from the tin and let it cool on a wire rack.
Avoid cutting it while hot, as this can affect the texture.

Common Mistakes and How I Fixed Them
I’ve made this loaf many times, and I’ve learned a lot along the way.
- I once used water that was too hot – It killed the yeast, and the dough didn’t rise. Now I always check that it’s just warm.
- There was a time I rushed the rising – The bread turned dense. Giving it time makes all the difference.
- I added too much flour while kneading – The loaf became dry. Now I keep it soft and slightly sticky.
- I skipped proper kneading once – The texture was uneven. Kneading builds structure.
- I sliced it too early – The inside turned gummy. Letting it cool is essential.
What Pairs Perfectly with Mary Berry Farmhouse Loaf
- Classic butter spread – Fresh slices with butter create a simple yet satisfying bite
- Hearty sandwich base – Use it for sandwiches with chicken, cheese, or vegetables
- Soup companion choice – Serve alongside warm soups for a comforting meal
- Breakfast toast option – Toast and top with jam or honey for a quick start
- Savory snack idea – Pair with eggs or avocado for a filling snack
Pro Tips for Making Mary Berry Farmhouse Loaf
- Always use fresh yeast – It ensures a good rise and light texture
- Keep liquids warm, not hot – Protects yeast activity
- Knead until smooth and elastic – Builds strong dough structure
- Allow proper rising time – Patience leads to better results
- Use a loaf tin for shape – Helps create even slices
- Brush top with milk before baking – Adds a golden finish
- Tap the base to check doneness – A hollow sound means it’s ready
Inspiring Variations of Mary Berry Farmhouse Loaf
- Whole wheat version – Replace part of the flour with whole wheat for a healthier option
- Seeded loaf style – Add sunflower or flax seeds for texture
- Herb-infused twist – Mix in dried herbs like rosemary or thyme
- Garlic butter loaf idea – Brush with garlic butter after baking
- Cheese-filled option – Add grated cheese into the dough for extra flavor
- Multigrain blend version – Combine different flours for depth
How to Store Mary Berry Farmhouse Loaf Properly
- Room temperature storage – Keep in a bread box or an airtight bag for up to 3 days
- Refrigeration method – Not recommended as it can dry out the bread
- Freezing option available – Slice and freeze for up to 2 months
- Wrap tightly before storing – Prevents moisture loss
Smart Reheating Tips for Mary Berry Farmhouse Loaf
- Oven reheating method – Warm slices at 160°C for a few minutes
- Toaster method choice – Toast slices for a crisp finish
- Avoid overheating – Keeps the bread soft and fresh
FAQs
Can I make this loaf without milk?
Yes, you can replace milk with water if needed. However, keep in mind that milk adds richness and gives the bread a softer crumb. When you use only water, the loaf will still rise well, but the texture may feel slightly firmer and less tender. If you want a middle ground, try using half milk and half water.
Why didn’t my bread rise properly?
This usually comes down to yeast issues or temperature. If your yeast is old or expired, it won’t activate properly. Also, if the water or milk is too hot, it can kill the yeast. On the other hand, if your kitchen is too cold, the dough may take longer to rise. A simple fix is to place the dough in a slightly warm spot, like near a turned-off oven with the light on.
Can I use whole wheat flour instead of white flour?
Yes, but using 100% whole wheat flour will result in a denser loaf. Whole wheat absorbs more liquid and doesn’t rise as much as white flour. For better results, try a mix—about 50% whole wheat and 50% white flour. This gives you a balance of nutrition and a softer texture.
How do I know when the bread is fully baked?
The easiest way is to tap the bottom of the loaf after removing it from the tin. If it sounds hollow, it’s done. You can also check the color—it should be golden brown on top. If you’re unsure, you can bake it for an extra 3–5 minutes, but avoid overbaking as it can dry out the bread.
Can I make this dough ahead of time?
Yes, you can prepare the dough in advance and let it rise slowly in the fridge overnight. This actually improves flavor. When you’re ready to bake, bring the dough back to room temperature, shape it, and allow it to rise again before baking.
Is it possible to freeze the baked loaf?
Absolutely. Once the bread has completely cooled, slice it and store it in an airtight bag or container. Freezing in slices makes it easier to use later. You can toast slices directly from frozen or let them thaw at room temperature.
Why is my bread dense instead of soft and fluffy?
Dense bread is often caused by under-kneading, not allowing enough rising time, or adding too much flour. The dough should feel soft and slightly sticky before kneading. Also, make sure you give the dough enough time to double in size during both rises.
Nutritional Value (Per Serving)
- Calories: 150–180 kcal
- Carbohydrates: 28g
- Fat: 3g
- Protein: 4–5g
- Fiber: 1–2g
Mary Berry Farmhouse Loaf Recipe
A Mary Berry Farmhouse Loaf is a traditional British white bread known for its soft crumb and lightly crisp crust. It’s typically baked in a loaf tin, giving it a neat shape that’s perfect for slicing.
- Prep Time: 20
- Cook Time: 60
- Total Time: 1 hour 20 minutes
- Yield: 1 loaf
- Category: Bread
- Method: Baking
- Cuisine: British
Ingredients
Dry Ingredients (Base Structure)
- Strong white bread flour – Provides structure and helps create a good rise; substitute with all-purpose flour if needed, but results may vary
- Salt – Enhances flavor and controls yeast activity
- Sugar – Feeds the yeast and adds a subtle sweetness
Yeast Mixture (Leavening Agent)
- Active dry yeast or instant yeast – Helps the dough rise; ensure it’s fresh for best results
- Warm water (not hot) – Activates the yeast; too hot can kill it
Liquid Components (Texture & Softness)
- Warm milk – Adds richness and softness to the crumb
- Butter (softened) – Improves flavor and creates a tender texture
Optional Enhancements
- Egg (optional) – Adds extra softness and richness
- Seeds (optional) – For topping, like sesame or poppy seeds
Instructions
In a small bowl, mix warm water with sugar and yeast. Stir gently and let it sit for 5–10 minutes until it becomes frothy.
This step ensures your yeast is active and ready to work.
In a large mixing bowl, combine the flour and salt. Add the yeast mixture, warm milk, and softened butter.
Mix everything together until it forms a soft dough.
Transfer the dough onto a lightly floured surface. Knead for about 8–10 minutes until it becomes smooth and elastic.
Think of kneading like stretching and folding—it builds the structure of the bread.
Place the dough in a lightly greased bowl and cover it with a clean cloth.
Let it rise in a warm place for about 1–1.5 hours, or until it doubles in size.
Once risen, punch down the dough gently to release air. Shape it into a loaf and place it into a greased loaf tin.
Make sure the dough fits evenly into the tin.
Cover the loaf again and let it rise for another 30–40 minutes.
It should rise just above the edge of the tin.
Preheat your oven to 200°C (180°C fan).
Bake the loaf for 25–30 minutes until golden brown and hollow-sounding when tapped underneath.
Remove from the tin and let it cool on a wire rack.
Avoid cutting it while hot, as this can affect the texture.
Wrapping Up
Baking a Mary Berry Farmhouse Loaf is more than just making bread—it’s about creating something wholesome from scratch.
Once you try it, store-bought bread may not feel the same. The texture, the flavor, and the satisfaction of baking it yourself make all the difference.
So, why not give it a go? Your kitchen will smell amazing, and your table will have something truly special.