Jam tarts are one of the simplest and most nostalgic desserts in British baking. The Mary Berry style keeps the recipe straightforward while producing beautifully crisp pastry filled with sweet fruit jam. With buttery shortcrust pastry and a glossy jam center, these small tarts are perfect for afternoon tea, snacks, or simple homemade desserts.
As the pastry bakes, it becomes lightly golden and crumbly, while the jam softens and develops a slightly sticky texture. The result is a delightful bite-sized treat that feels both comforting and timeless.
What are Mary Berry Jam Tarts?
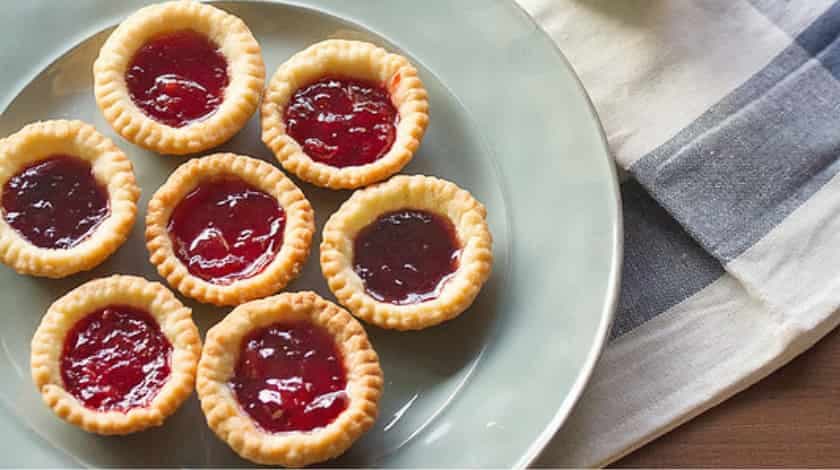
Mary Berry Jam Tarts are small pastry shells filled with fruit jam and baked until the pastry becomes crisp and golden. They are traditionally made using shortcrust pastry and a spoonful of jam such as strawberry, raspberry, or apricot.
Unlike many elaborate desserts, jam tarts rely on simple ingredients and classic baking techniques. The buttery pastry provides a delicate crunch that contrasts beautifully with the sweet jam filling.
These tarts are often served with tea or enjoyed as a quick homemade treat.
Try Other Mary Berry Recipes
Gather These Fresh Ingredients for Mary Berry Jam Tarts
Pastry
- Plain flour (225 g) – Forms the base of the shortcrust pastry.
- Butter (100 g, cold and cubed) – Creates a crumbly, buttery pastry texture.
- Cold water (2–3 tablespoons) – Helps bring the dough together.
Filling
- Fruit jam (150 g) – Strawberry, raspberry, or apricot jam works well.
Optional Garnish
- Icing sugar (for dusting) – Adds a light decorative finish.
Detailed Step-by-Step Instructions to Make Mary Berry Jam Tarts
Step 1 – Prepare the Pastry
Place the flour and cold butter in a mixing bowl. Rub the butter into the flour using your fingertips until the mixture resembles fine breadcrumbs.
Step 2 – Form the Dough
Add cold water gradually and mix until the dough comes together into a soft ball.
Step 3 – Chill the Dough
Wrap the dough in plastic wrap and refrigerate for 20 minutes. This helps the pastry become easier to roll.
Step 4 – Roll the Pastry
Lightly flour a surface and roll out the chilled dough to about 3 mm thickness.
Step 5 – Cut the Pastry Circles
Use a round cutter to cut circles of pastry slightly larger than the holes of a muffin tin.
Step 6 – Shape the Tart Shells
Press each pastry circle gently into the muffin tin to form small tart shells.
Step 7 – Add the Jam Filling
Spoon about 1 teaspoon of jam into each pastry shell. Avoid overfilling, as the jam may bubble during baking.
Step 8 – Bake the Tarts
Preheat the oven to 200°C (400°F) and bake the jam tarts for 12–15 minutes until the pastry turns golden.
Step 9 – Cool and Serve
Allow the jam tarts to cool slightly before removing them from the tin. Dust with icing sugar if desired and serve.
Common Mistakes and How I Fixed Them
- Using warm butter – The pastry became soft and sticky. Cold butter creates better texture.
- Overfilling with jam – The jam overflowed during baking. A small spoonful works best.
- Rolling the dough too thin – Thin pastry can tear when lifted.
- Skipping the chilling step – Chilled dough is easier to handle and holds shape better.
What Pairs Perfectly with Mary Berry Jam Tarts
- Afternoon Tea – Jam tarts are a perfect companion to hot tea.
- Whipped Cream – A small spoonful of cream adds extra indulgence.
- Fresh Berries – Strawberries or raspberries complement the jam filling.
- Vanilla Ice Cream – A warm tart with ice cream creates a lovely dessert.
- Custard – Creamy custard pairs beautifully with the crisp pastry.
Pro Tips for Making Mary Berry Jam Tarts
- Use cold butter – This creates a crumbly and tender pastry.
- Chill the dough before rolling – Prevents the pastry from shrinking during baking.
- Roll evenly – Uniform thickness helps the tarts bake evenly.
- Choose good-quality jam – The filling flavor depends on the jam used.
- Avoid overfilling – Jam expands slightly while baking.
- Cool before removing from the tin – Helps the tarts hold their shape.
Inspiring Variations of Mary Berry Jam Tarts
- Mixed berry jam tarts – Use blueberry or blackberry jam.
- Lemon curd tarts – Replace jam with lemon curd for citrus flavor.
- Chocolate jam tarts – Add chocolate chips on top of the jam.
- Almond jam tarts – Sprinkle sliced almonds over the filling.
- Mini fruit tarts – Add fresh fruit slices after baking.
How to Store Mary Berry Jam Tarts Properly
- Room temperature storage – Store in an airtight container for up to 2 days.
- Refrigeration option – Refrigerate if storing longer than two days.
- Separate layers with parchment paper – Prevents sticking.
Smart Reheating Tips for Mary Berry Jam Tarts
- Oven reheating – Warm at 160°C for about 5 minutes.
- Microwave option – Heat briefly for softer pastry.
- Serve warm or room temperature – Both work well.
Mary Berry Jam Tarts Recipe
Mary Berry Jam Tarts are small pastry shells filled with fruit jam and baked until the pastry becomes crisp and golden. They are traditionally made using shortcrust pastry and a spoonful of jam such as strawberry, raspberry, or apricot.
- Prep Time: 20
- Cook Time: 15
- Total Time: 35 minutes
- Yield: 12 tarts
- Category: Dessert
- Method: Baking
- Cuisine: British
Ingredients
Pastry
-
Plain flour (225 g) – Forms the base of the shortcrust pastry.
-
Butter (100 g, cold and cubed) – Creates a crumbly, buttery pastry texture.
-
Cold water (2–3 tablespoons) – Helps bring the dough together.
Filling
-
Fruit jam (150 g) – Strawberry, raspberry, or apricot jam works well.
Optional Garnish
-
Icing sugar (for dusting) – Adds a light decorative finish.
Instructions
Place the flour and cold butter in a mixing bowl. Rub the butter into the flour using your fingertips until the mixture resembles fine breadcrumbs.
Add cold water gradually and mix until the dough comes together into a soft ball.
Wrap the dough in plastic wrap and refrigerate for 20 minutes. This helps the pastry become easier to roll.
Lightly flour a surface and roll out the chilled dough to about 3 mm thickness.
Use a round cutter to cut circles of pastry slightly larger than the holes of a muffin tin.
Press each pastry circle gently into the muffin tin to form small tart shells.
Spoon about 1 teaspoon of jam into each pastry shell. Avoid overfilling, as the jam may bubble during baking.
Preheat the oven to 200°C (400°F) and bake the jam tarts for 12–15 minutes until the pastry turns golden.
Allow the jam tarts to cool slightly before removing them from the tin. Dust with icing sugar if desired and serve.
FAQs
What jam works best for jam tarts?
Strawberry and raspberry jams are the most common choices because they provide bright flavor and vibrant color.
Why do jam tarts overflow during baking?
Jam expands when heated. Using too much filling can cause it to bubble over the edges.
Can jam tarts be made with store-bought pastry?
Yes, ready-made shortcrust pastry works well and saves time.
How do I keep jam tarts from sticking to the tin?
Lightly greasing the muffin tin or using non-stick trays helps release the tarts easily.
Nutritional Value
- Calories: ~160 kcal
- Protein: ~2 g
- Carbohydrates: ~20 g
- Fat: ~8 g
- Fiber: ~1 g
- Sugar: ~10 g
Conclusion
Mary Berry Jam Tarts are a simple yet delightful dessert that combines buttery shortcrust pastry with sweet fruit jam. Their crisp texture and fruity filling make them a timeless treat perfect for tea time or casual baking.
With only a few ingredients and straightforward preparation, these classic tarts are easy to make and always satisfying.