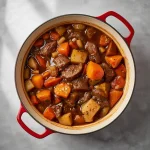
When I want a meal that feels like a proper hug in a bowl, my go-to is often a Hairy Bikers Chunky Chilli. This recipe delivers deep, smoky warmth and a texture that’s incredibly satisfying, with tender beef that practically melts. It’s a fantastic family dinner that’s freezer-friendly and perfect for customising with your favourite toppings.
With a total time of just over two and a half hours, most of that is hands-off simmering. I’d rate this as beginner-friendly, as the technique is straightforward. The key is patience during the browning stage—don’t rush it. That’s where the rich, foundational flavour starts.
What Is Hairy Bikers Chunky Chilli?
This is a classic, hearty beef chilli with a distinctly Tex-Mex flavour profile. What sets it apart is its “chunky” nature, achieved by using cubed beef chuck instead of minced meat. The result is a more substantial, stew-like dish where each piece of meat is a star.
The smokiness from the paprika and the earthy cumin create a warm, complex base. It’s the kind of comforting main course that improves after a day in the fridge, making it ideal for meal prep or feeding a crowd on a chilly evening.
Gather These Fresh Ingredients for Hairy Bikers Chunky Chilli
Here’s everything you’ll need, broken down into the key building blocks of flavour. I find this categorisation helps me prep more efficiently.
The Protein & Aromatics
- 1.5 lb beef chuck, cut into 1-inch cubes — Chuck is perfect for slow cooking. It has great marbling that breaks down into juicy tenderness. Patting it dry is non-negotiable for a good sear.
- 1 large onion, finely diced — This sweetens as it cooks, forming the flavour foundation. A yellow or brown onion works best here.
- 2 medium bell peppers (mixed colours), diced — They add sweetness, colour, and a pleasant texture. I love using one red and one green for visual pop.
- 4 cloves garlic, minced — Adds a punch of aromatic depth. Add it after the onions and peppers to prevent burning.
The Spice Blend
- 2 tablespoons chili powder — This is your primary source of heat and deep chilli flavour. Use a good-quality blend you enjoy.
- 1 tablespoon ground cumin — Provides an earthy, warm note that’s essential to Tex-Mex cuisine.
- 1 teaspoon smoked paprika — The “secret” ingredient. It gives a subtle, smoky backdrop that makes the dish taste like it simmered for hours over a fire.
- 1 tsp kosher salt & ½ tsp black pepper — Seasoning layers. I add salt at the end to control the final taste, especially since the stock can vary in saltiness.
The Liquids & Beans
- 1 can (14.5 oz) diced tomatoes, undrained — They provide acidity and body. The juices help deglaze the pot and form the sauce.
- 2 cups beef stock — Use a good-quality stock for the richest flavour. It’s the braising liquid that tenderises the beef.
- 1 can (15 oz) kidney beans, drained and rinsed — Adds heartiness and fibre. Rinsing them removes the excess sodium and starchy canning liquid.
- 2 tablespoons olive oil — For sautéing and searing. A neutral oil with a high smoke point is key.
Detailed Step-by-Step Instructions to Make Hairy Bikers Chunky Chilli
The process is simple but rewarding. Follow these steps for a foolproof result.
- Prep Everything First — Dice the onion and peppers, mince the garlic, and cube the beef. Pat the beef dry with paper towels. This mise en place makes the cooking flow smoothly and prevents burning.
- Heat the Oil — Warm the olive oil in a large, heavy pot over medium-high heat until it shimmers. A Dutch oven is ideal for its even heat distribution.
- Brown the Beef in Batches — Add half the beef cubes in a single layer. Don’t crowd the pan. Cook for 3-4 minutes per side until deeply browned, then remove. Repeat with the remaining beef. This creates fond, the flavourful browned bits on the pot’s bottom.
- Softening the Vegetables — Reduce the heat to medium. Add the onion and peppers to the same pot. Sauté for 5-7 minutes until softened, scraping up the fond.
- Wake Up the Garlic — Stir in the minced garlic and cook for just 1 minute until fragrant. Watch it closely to avoid burning.
- Toast the Spices — Sprinkle in the chili powder, cumin, and smoked paprika. Stir constantly for 30-60 seconds. You’ll smell their aromas deepen.
- Combine and Simmer — Return the beef and any juices to the pot. Add the tomatoes and beef stock, stirring well. Bring to a simmer.
- The Long, Slow Cook — Reduce heat to low, cover with the lid slightly ajar, and simmer gently for 1.5 to 2 hours. Stir occasionally until the beef is fork-tender.
- Add the Beans — Stir in the drained kidney beans. Simmer uncovered for 15-20 more minutes to heat them through and thicken the sauce slightly.
- Season to Taste — Add the salt and pepper. Taste and adjust. You might want a pinch more salt or a dash of chili powder here.
- Let It Rest — Take the pot off the heat and let it sit for 10 minutes. This allows the flavours to marry and the consistency to perfect itself.
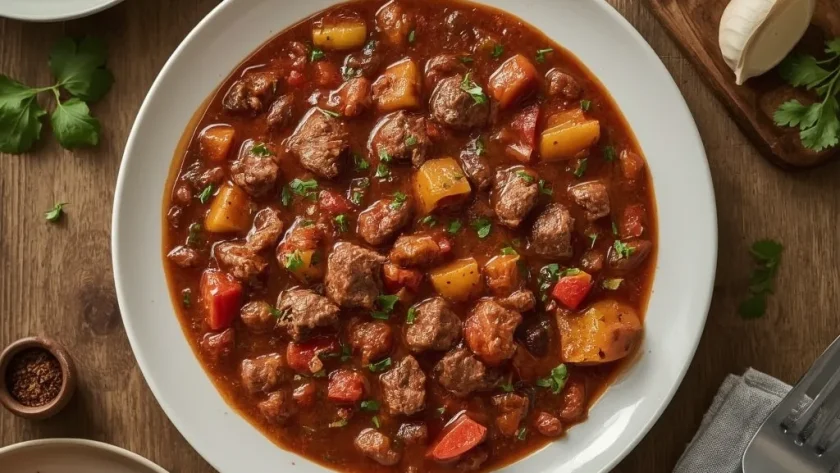
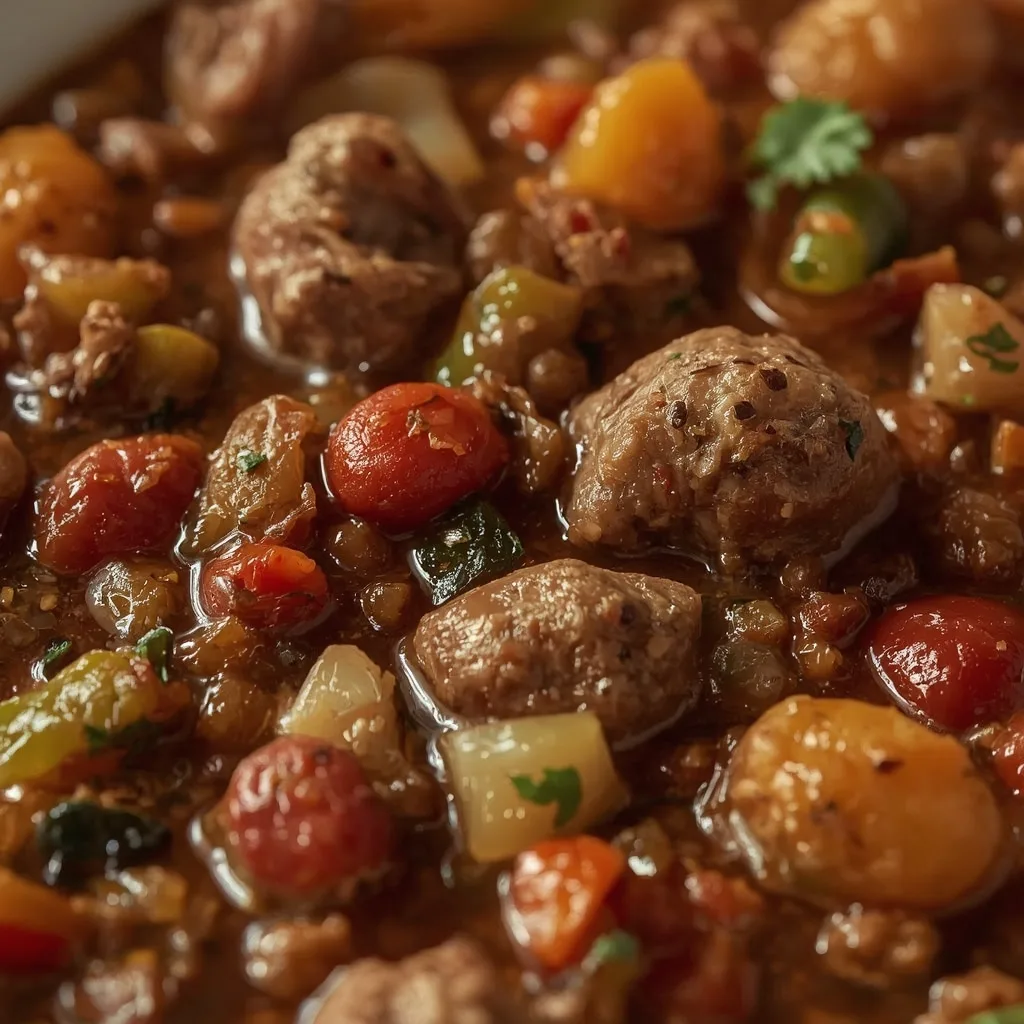
- Serve and Garnish — Ladle into bowls. Top with cheese, sour cream, or fresh cilantro. Serve with rice or warm tortillas on the side.
Common Mistakes and How I Fixed Them
I’ve made my share of errors with stews like this over the years. Here’s what I learned the hard way.
- Steamed, Not Seared Beef — Crowding the pot was my first mistake. The beef steamed and turned grey instead of browning. Now, I’m religious about browning in batches for that crucial caramelised crust.
- Burnt Spice Blues — Adding spices to a too-hot pot makes them bitter in seconds. I reduce the heat before toasting them and keep my spoon moving constantly for that brief minute.
- Underseasoned Result — I once added all the salt to the stock and tomatoes. By the end, after reduction, it was too salty. Now I season at the end, after tasting, for perfect control.
- Rushing the Simmer — Turning the heat up to speed things up only makes the beef tough and the liquid evaporates too fast. A low, gentle simmer is the only way to break down that collagen properly.
- Mushy Bean Mishap — Adding the beans at the beginning seemed logical. They dissolved into nothing after two hours. Adding them at the end preserves their texture and colour.
What Pairs Perfectly with This Chunky Chilli
This dish is a generous centrepiece. Here are my favourite ways to serve it.
- Fluffy White Rice — The classic base. It soaks up the rich sauce beautifully and stretches the meal for a larger family.
- Warm Cornbread — A slightly sweet, crumbly piece of cornbread is the ultimate texture contrast. It’s perfect for scooping.
- Buttery Mashed Potato — For the ultimate comfort food plate, serve a ladleful over a mound of creamy mash. It’s decadent and wonderful.
- Crisp Tortilla Chips — Use them for scooping like a hearty dip, or crush a few on top for a delightful crunch.
- A Simple Green Salad — Something with a sharp vinaigrette cuts through the richness and adds a fresh element to the meal.
Pro Tips for Making the Best Chunky Chilli
These small tweaks can take your result from good to fantastic.
- Choose the Right Pot — A heavy-bottomed Dutch oven is ideal. It distributes heat evenly, preventing hot spots that can cause burning during the long simmer.
- Dry Your Beef Thoroughly — Moisture is the enemy of browning. Taking a minute to pat the cubes completely dry with kitchen paper guarantees a better sear.
- Deglaze Fully — When you add the onions and peppers, scrape the pot’s bottom vigorously. Incorporating all the fond is where a huge amount of flavour lives.
- Check for Beef Tenderness — After 90 minutes, test a piece of beef. It should yield easily to a fork. If not, give it another 15-30 minutes. Chuck can vary in toughness.
- Skim the Fat — After cooking, you might see a little oil on the surface. For a cleaner finish, skim it off with a spoon before serving.
- Make It Ahead — This tastes even better the next day. Let it cool, refrigerate overnight, and gently reheat. The flavours deepen magnificently.
Inspiring Variations of This Hearty Chilli
Once you’ve mastered the base recipe, try these easy twists.
- Spicy Chipotle Version — Add one or two minced chipotle peppers in adobo sauce with the tomatoes. It brings a fantastic smoky heat.
- Turkey or Chicken Swap — Use diced turkey thigh or chicken thigh instead of beef. Reduce the simmer time to about 1 hour, or until the poultry is tender.
- Additional Vegetable Boost — Stir in a cup of sweetcorn or a diced courgette with the kidney beans for extra colour and veg.
- For a Darker, Richer Sauce — Stir in a tablespoon of tomato purée after the vegetables have softened and cook for a minute before adding the spices.
- Different Bean Choices — Black beans or pinto beans make a great substitute for kidney beans. The flavour profile shifts slightly, but it’s equally delicious.
How to Store Hairy Bikers Chunky Chilli Properly
This is a fantastic make-ahead meal. Here’s how to keep it tasting great.
- Refrigerate Promptly — Let the chilli cool to room temperature, then transfer it to an airtight container. It will keep well in the fridge for up to 4 days.
- Freeze for Longevity — Portion it into freezer-safe containers or bags, leaving some space for expansion. It freezes perfectly for up to 3 months.
- Cool Before Lidding — Don’t seal a hot container and put it straight in the fridge. This can create condensation and affect texture. Let the steam dissipate first.
- Label Everything — Write the date on your freezer containers. Three months goes by faster than you think, and this avoids guesswork.
Smart Reheating Tips for Leftover Chilli
Gentle reheating is key to preserving the texture of the beef and beans.
- On the Stovetop — Gently warm leftovers in a saucepan over medium-low heat, stirring occasionally. Add a splash of water or stock if it seems too thick.
- In the Microwave — For a single portion, use a microwave-safe bowl. Heat at 70% power for 2-3 minutes, stirring halfway through, to prevent explosive hotspots.
- Direct from Frozen — Thaw overnight in the fridge first for best results. Alternatively, you can reheat from frozen in a covered pot over low heat, adding a little liquid and stirring frequently.
FAQs
Can I make Hairy Bikers Chunky Chilli in a slow cooker?
Absolutely. Follow steps 1-3 to brown the beef. Then transfer everything (except the beans) to your slow cooker. Cook on low for 7-8 hours or high for 4-5 hours. Stir in the beans for the last 30 minutes of cooking.
How can I thicken my chilli if it’s too watery?
If it’s too thin after cooking, simmer it uncovered for an extra 10-15 minutes to reduce. You can also mash a few of the beans against the pot’s side to help thicken the sauce naturally.
Can I freeze Hairy Bikers Chunky Chilli?
Yes, it freezes exceptionally well. Cool it completely, then portion it into airtight containers. It will keep for up to 3 months. Thaw overnight in the fridge before reheating.
What cut of beef is best if I can’t find chuck?
Look for other stewing cuts like braising steak or shin. They have similar connective tissue that breaks down during slow cooking, resulting in tender meat.
How long does this chilli last in the fridge?
Stored properly in an airtight container, it will be at its best for up to 4 days. Always reheat it until it’s piping hot all the way through.
Is this recipe spicy?
As written, it has a warm, smoky flavour with mild heat from the chili powder. For more kick, add a pinch of cayenne pepper or some diced fresh jalapeño with the bell peppers.
Nutritional Value
Based on one serving (a quarter of the total recipe).
- Calories: 561
- Protein: 42g
- Fat: 33g
- Carbohydrates: Around 25g
- Fiber: 4g
- Sugar: Roughly 4g
- Sodium: 960mg
Try These Recipes
- Hairy Bikers Salmon Tray Bake
- Hairy Bikers Vegetarian Chilli
- Hairy Bikers Cranachan
- Hairy Bikers Slow Cooker Chilli Con Carne
Wrapping Up
This recipe has become a steadfast favourite in my kitchen for its reliability and crowd-pleasing nature. It’s the kind of meal that fills the house with an incredible smell and leaves everyone happily full. I hope this Hairy Bikers Chunky Chilli finds a regular spot in your cooking rotation, too. Give it a try this weekend—you won’t regret it.
PrintHairy Bikers Chunky Chilli

This Hairy Bikers Chunky Chilli is a robust and satisfying dish with tender beef cubes simmered to perfection in a spiced tomato base. The addition of bell peppers and kidney beans adds texture and heartiness, while smoked paprika and cumin provide a warm, smoky depth. Perfect for a comforting family meal, it’s freezer-friendly and easily customizable with your favorite toppings.
- Prep Time: 20
- Cook Time: 135
- Total Time: 155
- Yield: 4 1x
- Category: Main Course
- Method: Stovetop
- Cuisine: Tex-Mex
Ingredients
- 2 tablespoons olive oil
- 1 large onion, finely diced (about 1.5 cups)
- 2 medium bell peppers (mixed colors), diced into 1/2-inch pieces
- 4 cloves garlic, minced
- 1.5 lb beef chuck, cut into 1-inch cubes and patted dry
- 2 tablespoons chili powder
- 1 tablespoon ground cumin
- 1 teaspoon smoked paprika
- 1 can (14.5 oz) diced tomatoes, undrained
- 2 cups beef stock
- 1 can (15 oz) kidney beans, drained and rinsed
- 1 teaspoon kosher salt, or to taste
- 1/2 teaspoon black pepper
Instructions
- Prepare all ingredients: finely dice the onion, dice the bell peppers into 1/2-inch pieces, mince the garlic, and cut the beef chuck into 1-inch cubes. Pat the beef dry with paper towels to ensure proper browning. This prep work ensures even cooking and efficient workflow during the cooking process.
- Heat 2 tablespoons of olive oil in a large Dutch oven or heavy-bottomed pot over medium-high heat. The oil should shimmer but not smoke, indicating it’s hot enough for searing. Using a heavy pot helps distribute heat evenly and prevents burning, which is crucial for building flavor.
- Brown the beef in batches: add half the beef cubes in a single layer without overcrowding. Cook for 3-4 minutes per side until deeply browned on all sides, then remove with a slotted spoon and set aside. Repeat with the remaining beef. Browning in batches prevents steaming and creates fond, a flavorful crust on the pot’s bottom that enhances the chilli.
- After removing all beef, reduce heat to medium. Add the diced onion and bell peppers to the same pot. Sauté for 5-7 minutes, stirring occasionally, until the vegetables are softened and the onions are translucent. Scraping the bottom of the pot releases the fond, incorporating it into the vegetables for a richer base.
- Add the minced garlic and cook for 1 minute, stirring constantly, until fragrant. Garlic burns easily, so keep the heat moderate and watch for a light golden color. This quick cook unlocks its aromatic oils without introducing bitterness.
- Sprinkle in 2 tablespoons chili powder, 1 tablespoon ground cumin, and 1 teaspoon smoked paprika. Stir constantly for 30-60 seconds to toast the spices. Toasting enhances their depth and eliminates raw flavor, but avoid burning by maintaining medium heat and moving the spices quickly.
- Return the browned beef and any accumulated juices to the pot. Pour in 1 can diced tomatoes with their juices and 2 cups beef stock. Stir well to combine, scraping up any remaining bits from the bottom to fully integrate the fond into the liquid.
- Bring the mixture to a simmer over medium-high heat, then immediately reduce heat to low. Cover the pot with a lid slightly ajar to allow steam to escape. Simmer gently for 1.5 to 2 hours, stirring occasionally, until the beef is fork-tender. Slow cooking breaks down the collagen in the beef, resulting in a melt-in-your-mouth texture.
- After the beef is tender, add 1 can drained and rinsed kidney beans. Stir gently to incorporate without breaking the beans. Simmer uncovered for an additional 15-20 minutes to heat the beans and allow the chilli to thicken slightly for a hearty consistency.
- Season with 1 teaspoon kosher salt and 1/2 teaspoon black pepper. Taste and adjust seasoning as needed, adding more salt or spices if desired. The salt should balance the acidity from the tomatoes and enhance all the layered flavors in the chilli.
- Remove the pot from heat and let the chilli rest for 10 minutes before serving. Resting allows the flavors to meld and the chilli to thicken to a spoonable consistency, making it easier to serve and enjoy.
- Serve hot in bowls. Optionally, top with shredded cheddar cheese, a dollop of sour cream, and fresh cilantro leaves. Accompany with warm tortillas or cooked rice if desired. For an oven alternative, after step 8, transfer to a preheated oven at 300°F / 150°C and bake covered for 2 hours.
Notes
Store leftover chilli in an airtight container in the refrigerator for up to 4 days. For longer storage, freeze in portion-sized containers for up to 3 months. Reheat gently on the stovetop over medium heat, stirring occasionally, until heated through. Alternatively, microwave individual servings at 70% power for 2-3 minutes, stirring halfway.
Nutrition
- Calories: 561
- Sugar: 4g
- Sodium: 960mg
- Unsaturated Fat: 12g
- Carbohydrates: 25g
- Fiber: 4g
- Protein: 42g
- Cholesterol: 120mg
Keywords: hairy bikers chunky chilli, chunky chilli recipe, beef chilli con carne, tex-mex chilli, slow-cooked beef chilli, hearty chilli, weeknight dinner, family meal, spicy chilli, bean and beef chilli, comfort food, stovetop chilli